Nail art for beginners - 1
Nail art has swept the social media with new art surfacing around every corner. From the basic manicure people, have progressed to the French manicure which has now led to the French manicure with a twist and the reverse French manicure too! Call them what you may because at the end of the day they make your nails look pretty!
I am a nail art enthusiast and hence I’m going to keep the first post extremely simple.
Step 1: Wash your hands and moisturize them.
Step 2: Get that cuticle pusher out and gently push back your cuticles.( No! Don’t bring the scissors out to clip them. That is a serious no, no. Doing so will cause infection and you don’t want that.)
Step 3: Apply base coat.
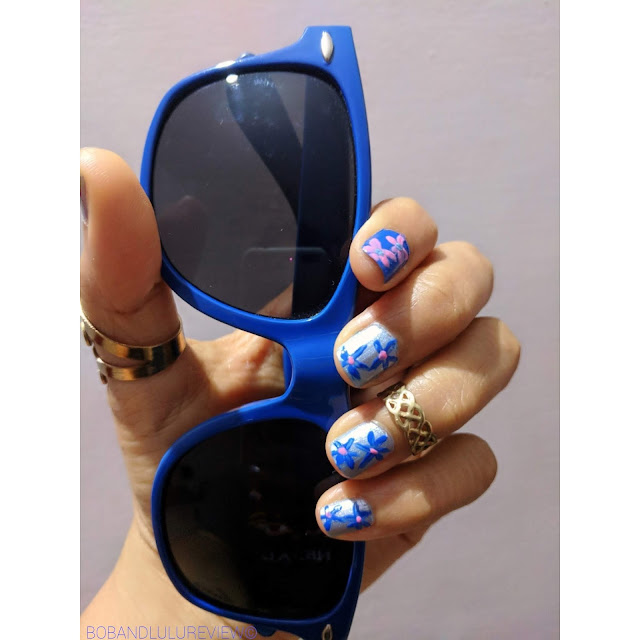
Step 4: Pick a colour. I chose blue, as I had both dark and light blue. I also chose one completely contrast colour – pink, to make the nail art ‘pop’.
Step 5: Paint 4 out of 5 nails with the light colour and one with the dark colour. The dark coloured nail is called the ‘accent’.
Step 6: Have an old eye liner brush or that No.0 brush in your painting kit? Well bring it out. Gently dip the brush in your nail polish bottle and draw a few strokes on your nails to resemble petals.
Step 7: Let it dry and then dot the center of the flower and fill in the petals if you don’t want it to look like thin streaks.
Step 8: Apply top coat and you are done!
Notes:
1. The advantage of this nail art for beginners is that there aren’t too many layers and hence is quicker to finish. As we progress with the posts on nail art we’ll take you through some manicures that need several layers. Personally I like letting my nails breathe so I don’t go beyond 5 layers.
2. I hope you liked this post. Also click 👉 here if you are looking to buy new nail polish. We have several reviews of different brands!


Comments