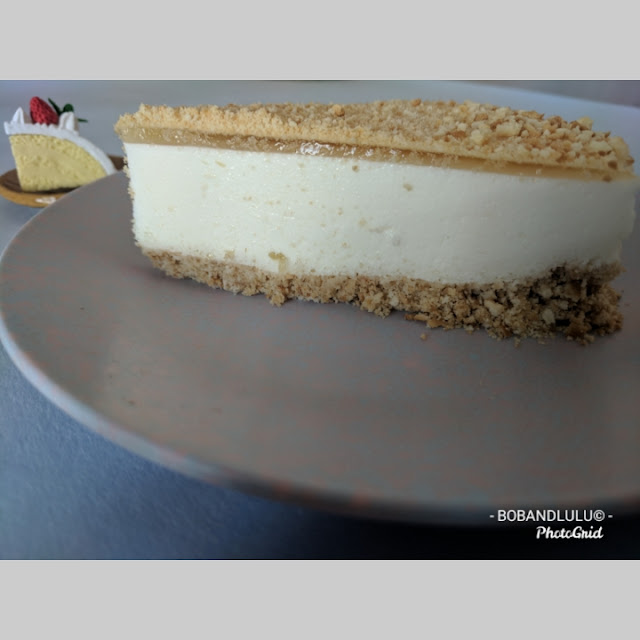
Litchi Cheesecake
I have a slight obsession with Japan and all things Japanese. This fascination of mine has lead me to some very exclusive websites where I can read and watch mangas and animes to my heart’s content. It was on the comment section of one particular anime called ‘Food wars’ that we all got discussing how intricate the Japanese are with their desserts. It was from there that I learnt to get the smoothest slices of cheese cake. This person told me that if I follow the recipe I will not be eating a heavy dense cheesecake but a soft fluffy piece of cloud.
The recipe might look intimidating but if you have a good playlist you shouldn’t feel too daunted.
I will now pass on this wisdom to you.
 |
| Litchee/Lytchee/Litchi – Are all the same. |
Ingredients:
100 gms litchi flesh finely chopped/minced (room temperature)
180 gms cream cheese (room temperature)
200 ml Fresh Cream (Frozen in the freezer for 3 hours then moved to the refrigerator 1 hour before use)
100 gms powdered sugar
6 tbsp powdered sugar
10 + 5 gms gelatin/agar agar
50 to 75 ml Lytchee juice
25 Marie biscuits
50 gms butter (room temperature)
9 to 12 cashews
9 to 12 cashews
Method:
The base:
1. In a mixer, powder the biscuits and transfer to a bowl. To this add the butter and mix well until butter has blended well with the biscuit powder.
2. Line a 10 inch diameter pan with butter paper and then flatten the biscuit butter mixture to form the base of the cheesecake. Refrigerate for 30 – 45 minutes or until you are ready with the filling.
The filling:
1. In a bowl empty the cream cheese and whisk it till it loosens up and peaks appear. Make sure it is at a smooth but firm consistency.
2. To this add 100 gms sugar and whisk till blended. Set aside.
3. You will need a bowl, whisk and ice cubes for the next step.
4. Keep the bowl and whisk in the freezer for at least an hour.
5. Make an ice bath with a bowl add ice cubes/ice packs and place the frozen bowl in it. Now add the fresh cream and 6 Tbsp powdered sugar and start whisking till you reach a smooth, fluffy, peaking consistency.
6. Once done gently start folding the cream with the cream cheese mixture. Once mixed well add the litchi and set aside.
Blooming the gelatin:
1. Take 10g gelatin in a bowl and wet it with room temperature water. Ensure not to add too much water. Just sprinkle enough to dampen the powder. Prepare a hot bath and melt the gelatin for 4-5 minutes.
2. Add the melted gelatin to the mixture and mix well.
3. Now bring out the bowl with the biscuit base and pour this mixture into the bowl gently.
4. Once done tap the vessel gently to dispense air bubbles and refrigerate for an hour.
The Topping:
5. One hour later take room temperature litchi juice and bloom 5gm gelatin and add it to the juice and mix well.
6. Remove the cheesecake from the fridge and gently pour the juice on top of the cake to make a thin sheet. (I used 50 ml to make a really thin sheet you may use 75 ml to make a mildly thicker sheet.)
7. Refrigerate this for more than 8 hours or overnight to set completely.
8. Next day, in a pan dry roast cashews till a golden brown and then make a fine powder and sprinkle it on top of the cheesecake before serving.
Notes:
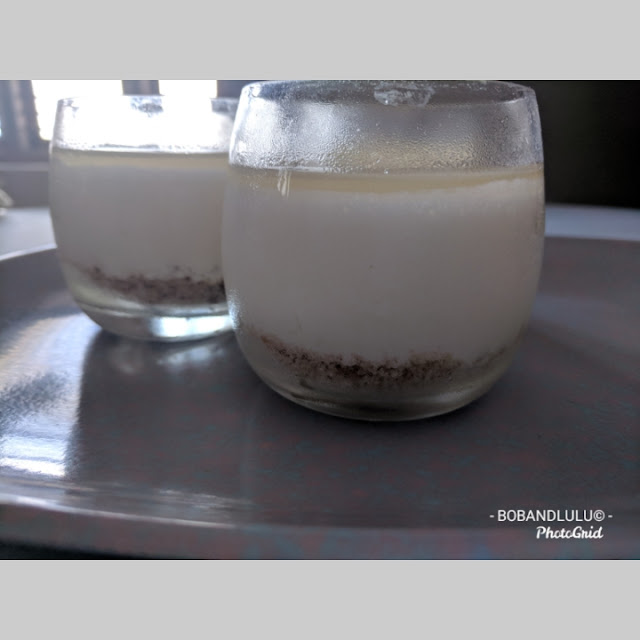
· I didn’t have a 10 inch dish. I used a 7.5 inch dish and because I didn’t know how to appropriately amend the proportion of ingredients, I used the leftovers to make cup – cheesecakes!
· Whisking the cream cheese helps create air pockets that make the mixture fluffy.
· Add the litchi last as it is a ‘watery’ fruit. You don’t want a runny mixture.
· The ice bath, the bowl and whisk in the freezer helps reaching the required consistency of the cream quickly.
· You may skip making the litchi sheet if you can manage to make pretty slices of the fruit for topping. I was bushed by the time I reached the sheet stage and ended up eating the left over fruit.
· The recipe actually is to make a litchi juice sheet and then cut designs to top the cheesecake. I like taking the easier route.
If you want to start with a basic cheesecake you might want to try making this Oreo Cheesecake.


Comments