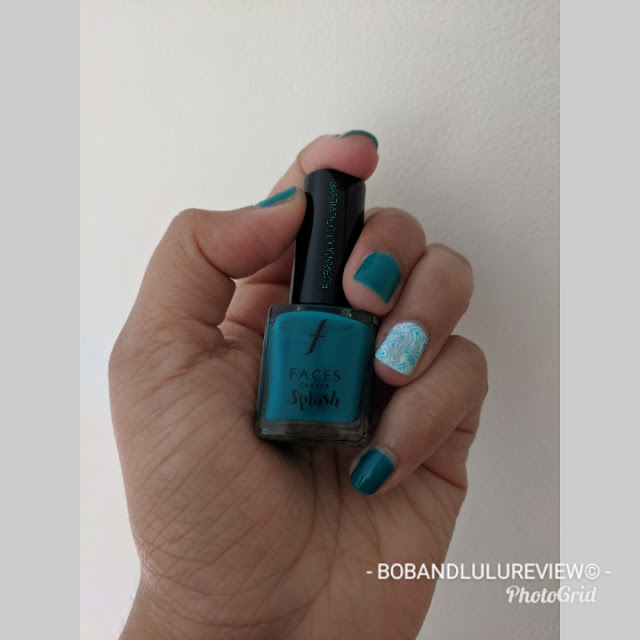
Nail art for beginners - 2 (Stamping)
“A picture speaks a 1000 words, sure…but a video can get across a 1000 sentences!” - Bob©
Hello everyone we are back with another ‘Nail art for beginners’ post. This post is slightly different from the previous one because I actually had to shoot a few 'under - 30 seconds ' videos to show you the steps. In our previous post I had introduced the most basic nail art tutorial, so I decided to take it up a notch with this tutorial and am introducing you to ‘Stamping’. In the future, we’ll be posting tutorials that require tools and some that don’t.
To Stamp you’ll need the following:
Tissue paper,
Cotton,
Scotch tape.
Once you have gathered these and placed them around you, start prepping your nails. In our previous post I had mentioned a few steps to prep your nails, since then I have been introduced to rubbing alcohol which has become a game changer in all aspects of make-up and nail routines. Following are the steps for this tutorial.
Step1: Wash your hands and moisturize them.
Step2: Get that cuticle pusher out and gently push back your cuticles.( No! Don’t bring the scissors out to clip them. That is a serious no, no. Doing so will cause infection and you don’t want that.)
(I hadn’t mentioned next👇 step in the last post)
Step 2a. After you push back your cuticles, spray a bit of rubbing alcohol on a piece of cotton and rub your nail beds, this helps remove oils from your nails and helps increase your manicure’s life span 👉check our Instagram video on the same.
Step 3: Apply base coat. (Optional)
Step 4: Pick a colour. I chose Bahama Breeze (58) by Faces Canada, Crystal Clear (101) and Porcelain Party (102) by Maybelline Colour Show.
Step 5: Paint 4 out of 5 nails with the colour (Bahama breeze is an emerald colour with a hint of blue) you want on your nails and paint one nail white (Porcelain party).
For a detailed ‘how to’ of steps 6 through 10 check our latest 👉Instagram update.
Step 6: Once your nail polish is dry, pick a pattern on your stamping plate. Use the colour you chose to apply on 4 of your fingers to coat half the rectangle of the pattern you have chosen and scrape the paint across the entire pattern to evenly spread the nail colour.
Step 7: Immediately roll the spongy side of the stamper on the plate to get your design on the stamper.
Step 8: Roll the stamper on your ‘accent’ nail (White).
Step 9: Once the nail is stamped, clean the plate and scraper using cotton and nail polish remover.
Step 10: Print the left over colour on your stamper on to a piece of scotch tape. Do not use nail polish remover or any other product to clean the squiggly stamper. Only use scotch tape.
Step 11: Repeat steps 6 to 10 on your other hand as well.
Step 12: Seal the manicure with a top coat (Crystal Clear) and let it dry.
TIPS:
You can paint all your nails white and use different colours and patterns to stamp them.
You can paint 4 nails white and stamp them and paint the 5th nail with a contrasting colour.
You can also paint your nails with a light colour and stamp them using a dark color.
Highly pigmented colors tend to print better than light colours.
Once you start stamping there is so much more to explore!!! Have you stamped your nails before? Do you know of any tips and tricks?
Follow us on Instagram and Facebook. Every so often we update you on extensions of what we blog here.
P.S: Yes, I hesitated in the video narration when I meant to say 'Blue film', I paused and said blue coating film. This just goes to show how society has conditioned us to believe that blue film can mean only one thing.
P.P.S: I have linked the products used by me. Move the cursor on the things listed under, 'to stamp you'll need the following' and happily explore the infinite products available to you across different platforms. The stamper and scraper was gift from my brother. I don't know it's actual price in Yen as it is originally a Japanese product.
If you are buying a stamper online try the transparent/ see through stamper. My friend has some really nice things to say about this product.
Happy Stamping!


Comments
AMD